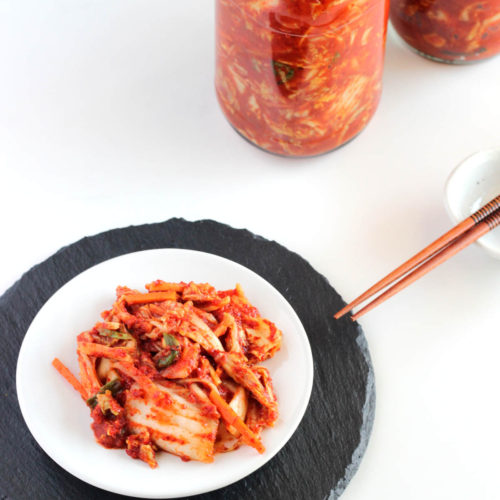
Easy small batch vegan kimchi
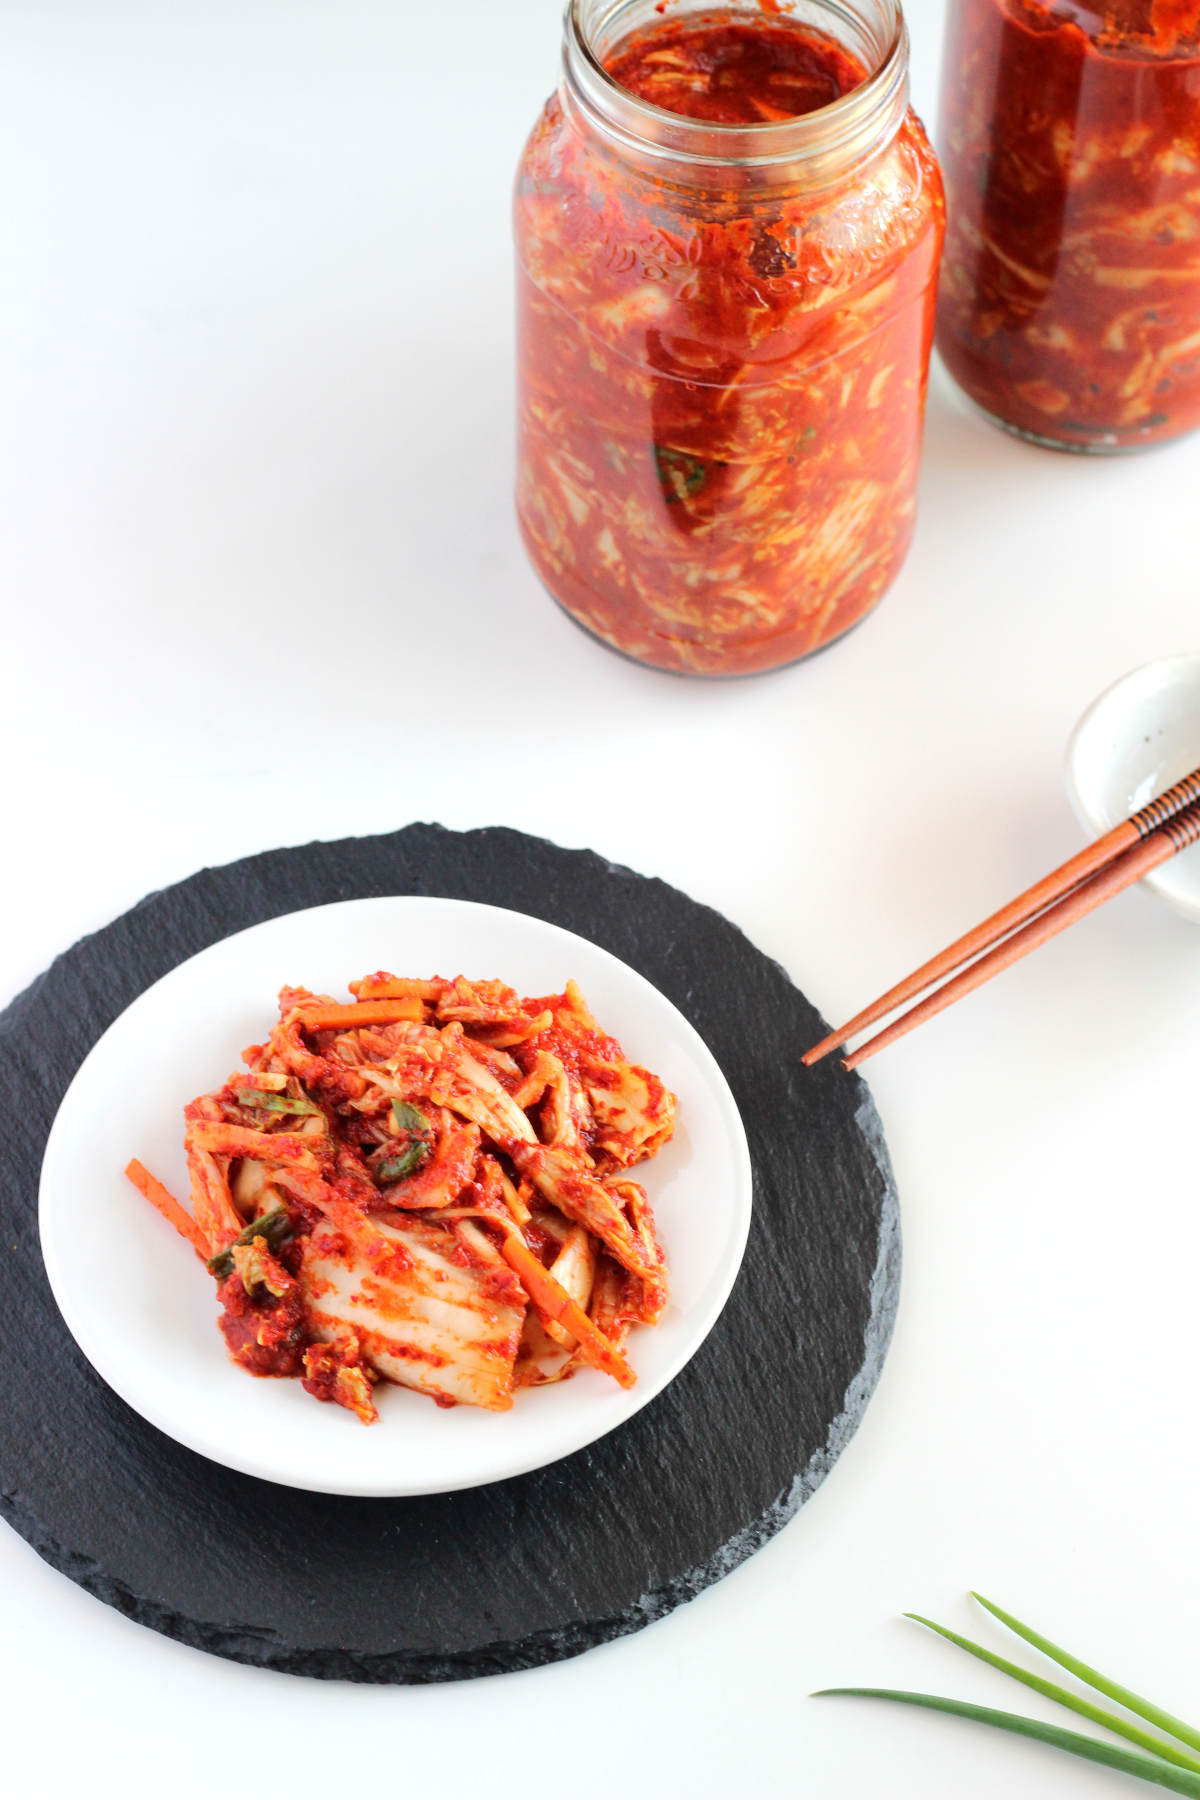
Easy vegan kimchi, the vegan version of Korea’s favourite lacto-fermented condiment. Crunchy napa cabbage, carrot and radish in a flavourful sauce with garlic, ginger and onion.
Kimchi is deep rooted in Korean food culture. Koreans prepare many different types of kimchi but lacto-fermented napa cabbage kimchi is the most well known and has been gaining popularity around the world, crossing cultural boundaries and finding it’s way into menus and homes, including mine!
Korea sees harsh winters and back in the day when fresh veggies were seasonal and not something to be found in supermarkets all through the year, kimchi was a way of preserving vegetables to last through the winter. Kimchi was prepared by families during late winters and half buried under the ground in earthenware pots, where it would slowly ferment and ‘ripen’.
Why make homemade vegan kimchi?
Traditionally, Kimchi is made with fish sauce and fermented shrimp. In recent years, it is possible to find packaged vegan kimchi, but it may still be hard to find ‘fresh‘ vegan kimchi and by the time it reaches you, it may already be very sour. Advantages of making homemade vegan kimchi
- Very easy to make
- Inexpensive
- You get to eat a batch of ‘fresh kimchi'(before fermenting) with hot rice!
- You are in control of the flavour, tweak it to your liking.
- Ripen(ferment) it to suit your taste.
Key Ingredients
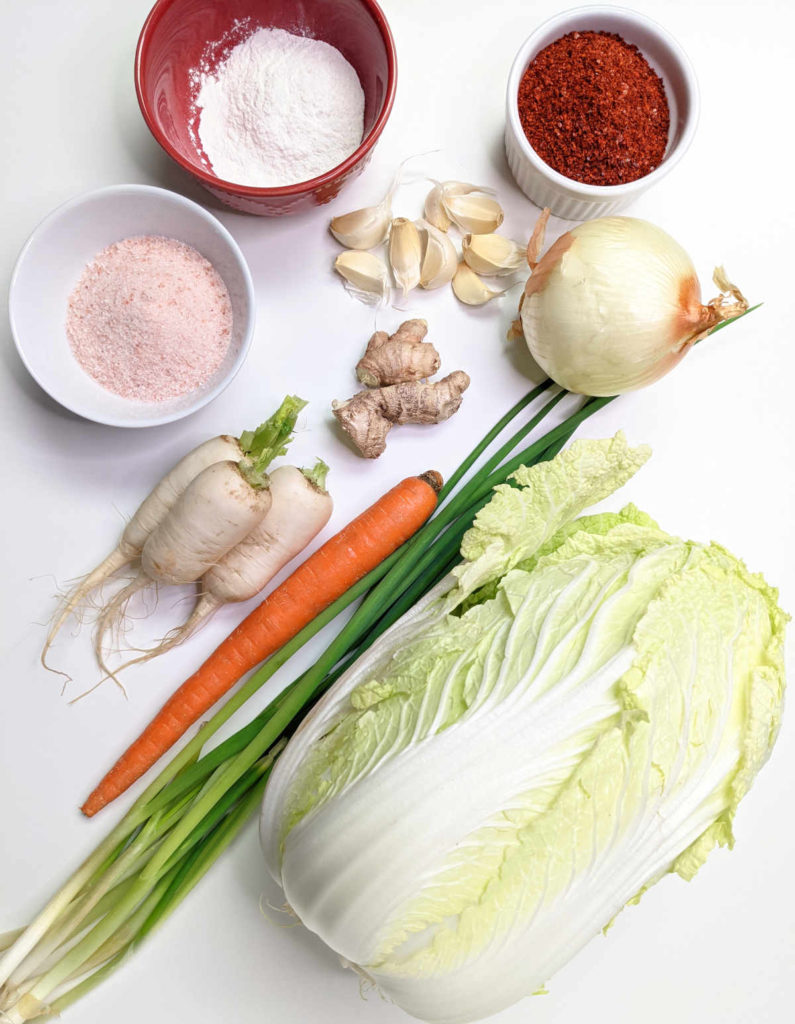
Salt
Non – iodized coarse salt is ideal as iodized salt can hamper fermentation. I used Himalayan pink salt. Sea salt, kosher salt can be used too.
Napa Cabbage
Napa cabbage is a Chinese variety of cabbage and is available throughout the year in Asian stores.
SUBSTITUTION – Use regular green cabbage instead.
Vegetables
I like adding carrots, radish, green onions/spring onions in Kimchi. If Asian chives are available, I add a few stalks of chives too.
Rice flour
Glutinous rice flour is traditionally used in making Kimchi. Regular rice flour or even all purpose flour can be used instead.
Gochugaru/Korean red pepper powder
Gochugaru gives Kimchi it’s characteristic red colour. It is available in Asian markets and online. For my Indian tastebuds, Gochugaru is not spicy. However, use less/more of it to suit your taste.
SUBSTITUTION: If Gochugaru is not available, any other dry red pepper can be used to make Kimchi. Coarsely powder dry red chillies and use it in your kimchi. You may need to adjust the quantity depending on how spicy the chilli is.
I once used Indian dry red chillies to make Kimchi. In my opinion, Korean peppers aren’t as spicy as Indian peppers. The color of Kimchi made with Indian chilli wasn’t as bright and the Kimchi was super spicy but nevertheless, it was very tasty.
Procedure
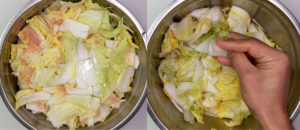
Brining
- Brining is the process of salting Napa cabbage to make it release water.
- To brine, I use about 2 tbsp salt for every pound(approx 1/2 kg) of Napa cabbage.
- After napa cabbage releases it’s water(about 2 hrs), rinse it well in fresh water thrice to remove excess salt. Drain well. It does not need to be dried.
Kimchi paste
- Make a slurry using Rice flour/regular flour. Let it cool.
- Blend cooled rice slurry with ginger, garlic, onion and apple.
- Mix in the Gochugaru, sugar and salt.
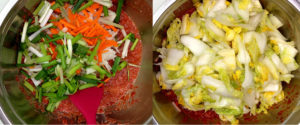
- Add julienned carrots, radish and green onions.
Fermenting
Mix Kimchi paste with well drained, brined napa cabbage. You can eat Kimchi fresh at this stage with some hot rice.
How to fill Kimchi into containers
- I like to use airtight glass jars, old pasta bottles do the trick.
- Press kimchi down to remove air pockets.
- Do not fill the jar completely. Leave 2-3 inches of free space on the top for fermentation.
Fermentation/ripening of Kimchi can be done two ways
- In the refrigerator.
If the kitchen is very warm, I would place kimchi directly in the refrigerator and let it slowly ferment/ripen in the refrigerator. It would take about 2 weeks to ferment.
Traditionally Kimchi is fermented at very low temperatures. Kimchi is prepared just before winter and buried in clay jars where temperature remains close to freezing. In today’s world, people use kimchi refrigerators to maintain a constant low temperature. When making smaller batches, regular refrigerator works just fine!
2. First at room temperature and then in the refrigerator.
In a moderately warm kitchen, kimchi can be ripened on the counter for two days and then be placed it in the refrigerator.
As kimchi ferments or ripens, it releases a little more water from the veggies. You will also see some tiny bubbles, a sign of fermentation. Once fermented, it will have a zing, a slight tartness and the pungency from garlic and ginger mellow to give a more rounded off taste to the kimchi.
Storing and serving
Store Kimchi in the refrigerator and serve cold. Remember to use dry utensils to scoop kimchi out of the jar. Kimchi is best eaten within 1-2 months, after which the texture and flavour aren’t the best. Kimchi past it’s prime can be used in cooking like these mung bean pancakes.
Serve Kimchi with rice or rice porridge for a simple meal or with other sides as part of a meal. Kimchi can also be cooked into dishes like fried rice, mung bean pancakes and kimchi jiggae. I also like to snack on a piece or two when a craving for something savory hits! If you are like my husband, top it on oats for a savory porridge!
How long is kimchi good for?
As long as it has no mold, kimchi is safe it eat. When prepared the right way, Kimchi never really goes bad in the refrigerator. It will keep fermenting further and getting more sour. Sour kimchi can be used in cooking to make many Korean dishes.
Easy small batch vegan kimchi
Ingredients
For brining
- 3 pound Napa cabbage or use green cabbage instead(approx 1500 grams)
- 1 cup water
- 6 tbsp non-iodized coarse salt
Other vegetables
- ½ cup carrots julienned
- 1 cup radish julienned
- 7 stalks green onions
For Kimchi paste
- 2 tbsp glutinous rice flour/rice flour or use all purpose flour instead
- 1½ cups water or use kombu broth for a fishy taste
- 1 cup Gochugaru/Korean red pepper adjust to suit your taste, check notes for substitution
- 7 cloves garlic
- 1 inch ginger
- ½ yellow onion
- ½ apple optional
- 3 tbsp non iodized coarse salt
- 1 tbsp sugar
Instructions
Brining
- Discard the outermost layer of napa cabbage if dirty.
- Cut napa cabbage into quarters. Remove the stem and cut into bite sized pieces.
- Transfer chopped napa cabbage into a huge bowl.
- Add 6 tbsp coarse salt and 1 cup of water to the napa cabbage.
- Mix well and let it brine for two hours. Mix once every half an hour to distribute the salt. Napa cabbage releases it's water in a few hours.
While cabbage is brining, make rice flour slurry.
- In a saucepan, mix glutinous rice flour with 1½ cups of cold water. Whisk to remove lumps.NOTE: Use kombu(a type of seaweed) broth instead of water for a fishy flavour.
- Set the pan on medium heat and keep stirring until it turns translucent, thickens and turns into a slurry. Turn off the heat.
- Allow the slurry cool down completely.
Wash brined napa cabbage
- Thoroughly wash the brined napa cabbage with fresh water, changing water thrice. This removes the excess salt from the cabbage.
- Drain the cabbage well, there is no need to dry it.
Make kimchi
- Add cooled rice slurry, garlic, ginger, onion, apple into a blender and blend into a paste. Transfer to a bowl.
- Add julienned carrot, radish, chopped green onions into the slurry.
- Add gochugaru or coarsely powdered dry red chillies, salt, sugar. Mix well.
- Add well drained napa cabbage into kimchi paste and mix well.
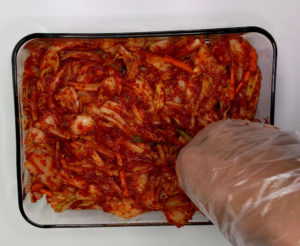
- Fill kimchi in airtight containers.
- Press down as much as possible to remove air pockets. Let the veggies be submerged in kimchi paste.
- Do not fill containers to the brim. Leave 2 inches of space at the top for fermentation.
Fermenting
- Before fermenting, kimchi can be served with rice as 'fresh kimchi'. Top kimchi with toasted sesame seeds.
- In hot climates, I recommend placing kimchi in the refrigerator and letting it slowly ferment/ripen in the refrigerator. It takes 1-2 weeks to ripen.
- In moderate climates, kimchi can be ripened at room temperature for 1-2 days to accelerate fermentation, before storing in the refrigerator.
- When kimchi ripens/ferments, it releases a little more water from the veggies and you will see some bubbles appear. It will start getting hints of sourness and the flavour gets more rounded.
- Serve kimchi cold from the refrigerator.
- Use kimchi within 1-2 months. When it turns too sour for your liking make these mung bean pancakes to finish off the kimchi.
Video
Notes
- Adjust the quantity of chilli powder to suit your liking.
- For extra umami, to make the slurry, use broth made with kombu and shitake mushroom.
- Everyone likes kimchi at different stages. When making it for the first time, taste every few days to see how it appeals to your palate.
- Use a clean, dry spoon to serve kimchi from the jar. Press down the kimchi before storing it back in the refrigerator.
- Kimchi will continue to ripen in the refrigerator and will get more sour as weeks pass.
- As long as it’s not moldy and smells really off, kimchi is good to use.
- Place baking soda/coffee grounds next to kimchi, to remove any kimchi smell from the refrigerator 🙂
Did you try this recipe?
Do leave a star rating and comment below to let me know how you liked it! I would love to see the photos too! Tag me on social media!
Thank you so much for stopping by! It really means a lot to me!